First Raised Bed Garden Box

Thursday, April 27, 2017


I love square foot gardening!  We began reading Mel Bartholomew's book and gathered some good information before we got started, and then found this raised bed plan from Lowes.  It was so easy to build and turned out so cute!  The most expensive part was the soil.  We used a mixture of bagged garden soil, peat moss, and Black Kow compost.  The box was only about $25 to build, but I think the soil was around $50 for a total of about $75 per box.  Here are some pictures showing plant progression so far!


  We have already gotten more spinach from just two squares than we can keep up with!  We have also harvested lettuce as well, and we are loving our little raised bed!  


  This entire colander of spinach was harvested in just one cutting, and I only took the larger leaves!!  It has definitely been rewarding, and the best part is no plowing, no tilling, and no bad soil!  What's not to love?!  

Happy Spring!
Heather


Sunday, March 12, 2017


   Hello! I just wanted to pop in and say Happy Sunday morning!  Ahh, spring is in the air (in a freezing outside sort of way)!  We were supposed to get snow last night, but woke up to sunshine instead!  Though it is cold, it still seems refreshing!  I love that by the time one season is coming to an end, I am so ready for the next one to begin!  God created us that way so we could continually be renewed with life and zeal!  Down with the winter decor, and up with light, bright, spring!  Bird's nests, plants, flowers!
   And speaking of plants and flowers,  we have made one raised bed to start our square foot gardening (cool weather crops, of course)!  We had some snow and freezing weather, so we put on a little "greenhouse" with pvc pipes and plastic.  We will be sharing pictures and progress soon!
  Have a good week!!

~  Heather

Signs of Spring

Saturday, February 25, 2017


   Hello!  I just wanted to stop in and share some pictures I took this week! 


 I know there is more cold weather to come, but the signs of spring are here!  I love spring! 

  The birds chirping, flowers, flowers, and more flowers, rain showers, gardening, warmer air and sunshine!  What's not to love? 


   I think it's amazing that God made things so beautiful!  I mean fruit trees could have produced fruit even if the flowers weren't so stunning, but He made them special so we could enjoy them!  I consider them like little gifts from above, brightening our day, and giving us a fresh new perspective each time spring comes around!


 Have a great day, and Happy "Early" Spring!


Spring is Almost Here

Friday, February 24, 2017


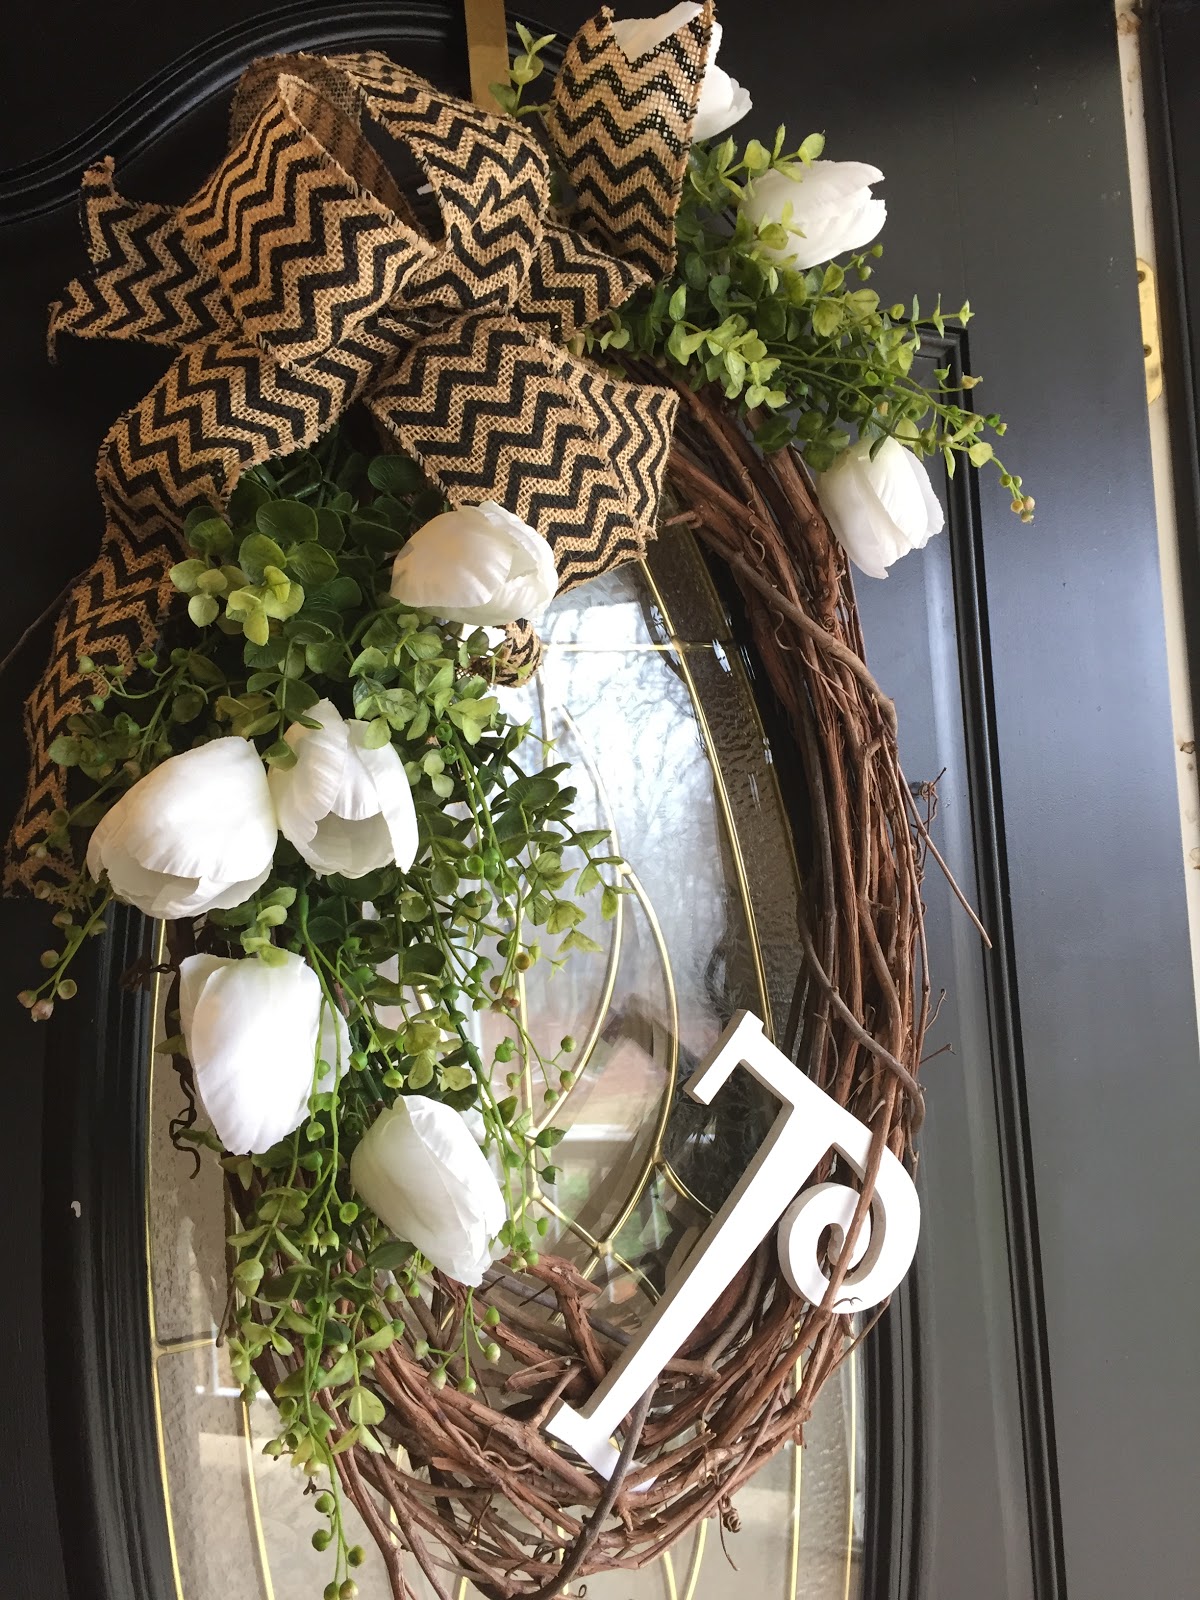
  Hello!  I have been so excited that spring is just around the corner!  Flowers are starting to bud, and the weather is getting a bit warmer.  And the "clean and decorate" mode has already hit me!  I have been adding some spring touches around the house, including in this wreath that I made for the front door.  To make the wreath I just used an oval grapevine form and tucked in some greenery (mine was from Hobby Lobby).  I kind of arched the greenery around the top and then down one side.  I then added some burlap ribbon with wire so you can shape it correctly and placed a painted "T" at the bottom.  Notice how everything is set diagonally on the wreath.  This keeps everything more aesthetically pleasing.  Anyway,  I just tucked in the white tulips to add a little touch of spring, and done!  You can use hot glue for anything that is loose, but not the seasonal pieces like the tulips so they can be easily removed.  This is so easy and can be customized with your choice of ribbon!  Happy Spring!


Farmhouse Sign

Tuesday, February 07, 2017

  This little farmhouse sign was so easy to make.  Simple cut a small board or purchase a ready - to - decorate sign and stain it in any color you prefer.  Then just print the word farmhouse on regular copy paper making sure the font is the proper size for your project.  You may need to print on multiple pages and tape them together to get the full word as large as you need it.  Now the fun part!  For light colored wood, color over the entire back of the word with a pencil.  Then flip it over and position your word correctly over the board making sure to center it properly.  Then trace firmly around each letter.  This will transfer the pencil on the back perfectly to your new sign.  For darker wood try chalk on the back, and for very soft wood like pine, skip the coloring of the back and simply trace the letters very firmly.  This will leave a nice impression or outline of the letters.  Now you will just take a paint marker and fill in the letters by hand!  If you wish, once it has had plenty of time to dry, you can add a poly finish or other sealer of your choice to finish the project!

Blueberry Crumb Pie

Saturday, February 04, 2017


We just realized this week that we never make blueberry pie.  Never.  We make blueberry muffins, and even ginger blueberry pancakes, but not blueberry pie!  My youngest son requested it, and I thought it was a great idea, so here it is!  I found the recipe on Pinterest of course, and it looked too good to pass up!  You can find the link and make it too by clicking here!


Antiqued Wooden Crate

Tuesday, January 31, 2017


I bought this little wooden crate from Wal-Mart for about $10, and decided it would be a nice quick project for "antiquing".  It started out looking like this.


I gave it a good sanding to remove the sticker that refused to peel off.  Don't you just love those?  Or maybe not.  Anyway once that is gone, it's time to start the process.  Here is a perfect opportunity to tell you how to make steel wool and vinegar stain.  I love using it because it lacks the strong chemical odor and toxicity of store bought stain.  It works not from a coloring process but an oxidizing process.  Keep in mind that it will respond differently with different types of wood.  For this project I just wanted it on the base to give it a darker more weathered look underneath the paint.
Simply tear a #0000 steel wood pad in half, place it in a mason jar and fill the jar with white vinegar.  Some say not to put the lid on but I do.  Just make sure it is fairly loose as it builds up pressure in the jar.  Let this sit for about one week.  The longer is sits the darker it will be.  If it appears clear, that's ok.  Just give it a shake.


Brush this on and wait about 15 minutes!  Watch the transformation!!


Here you can kind of see the color difference between the new wood on the bottom right and the "old" look of the oxidized wood. Once that has dried thoroughly, brush on some white chalk paint.  If you let the stain dry well and have a good chalk paint, one coat may work well.  You may, however, need to use two coats if any bleeding occurs from the stain.


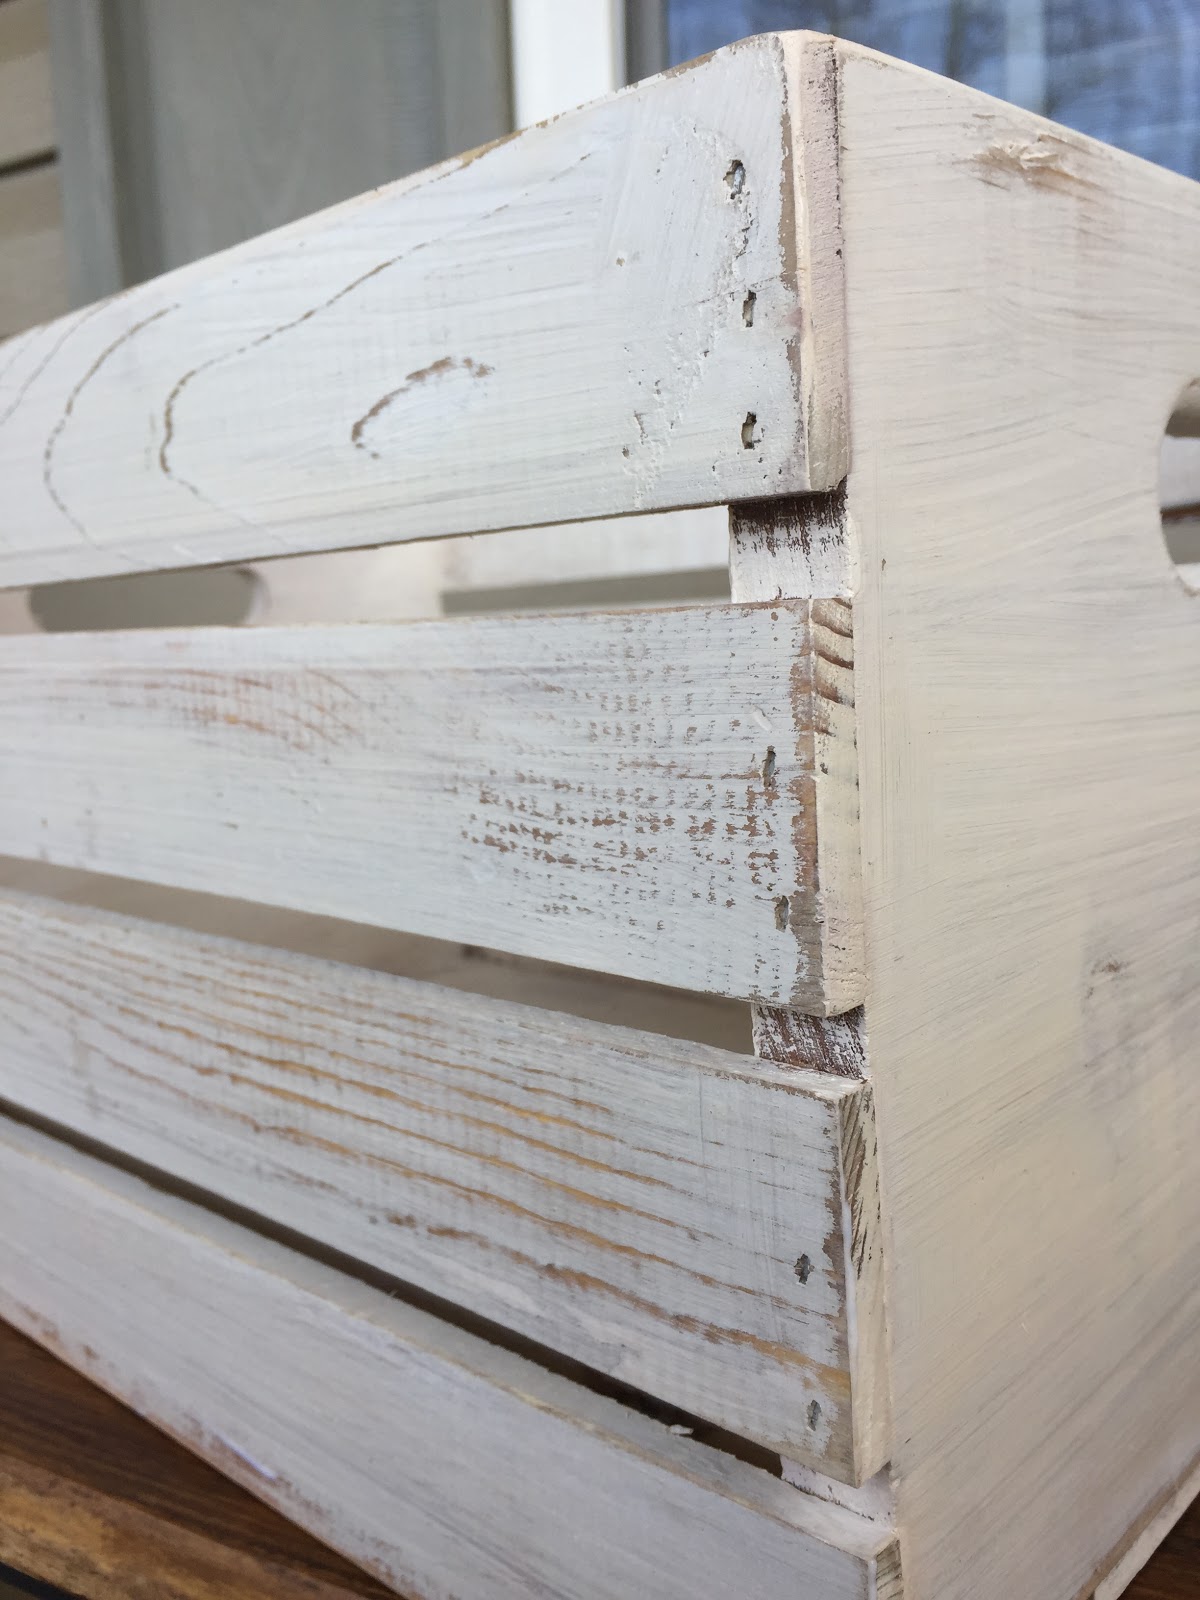
Let that dry completely and give it a good sanding with a hand sander and some 220 grit sandpaper.  Focus especially on the edges where natural wear and tear would happen!!  Don't worry about perfection.  You want it to look well loved and used!


Here is a close up of some of the detail.


So "farmhouse" don't you think?!!!  And that's what we love here!!  If you wish, you can add a coat of sealing wax to finish the project and you're done!!
Hope you try this at home and enjoy!!

Popular Posts

Translate