Antiqued Wooden Crate

Tuesday, January 31, 2017


I bought this little wooden crate from Wal-Mart for about $10, and decided it would be a nice quick project for "antiquing".  It started out looking like this.


I gave it a good sanding to remove the sticker that refused to peel off.  Don't you just love those?  Or maybe not.  Anyway once that is gone, it's time to start the process.  Here is a perfect opportunity to tell you how to make steel wool and vinegar stain.  I love using it because it lacks the strong chemical odor and toxicity of store bought stain.  It works not from a coloring process but an oxidizing process.  Keep in mind that it will respond differently with different types of wood.  For this project I just wanted it on the base to give it a darker more weathered look underneath the paint.
Simply tear a #0000 steel wood pad in half, place it in a mason jar and fill the jar with white vinegar.  Some say not to put the lid on but I do.  Just make sure it is fairly loose as it builds up pressure in the jar.  Let this sit for about one week.  The longer is sits the darker it will be.  If it appears clear, that's ok.  Just give it a shake.


Brush this on and wait about 15 minutes!  Watch the transformation!!


Here you can kind of see the color difference between the new wood on the bottom right and the "old" look of the oxidized wood. Once that has dried thoroughly, brush on some white chalk paint.  If you let the stain dry well and have a good chalk paint, one coat may work well.  You may, however, need to use two coats if any bleeding occurs from the stain.


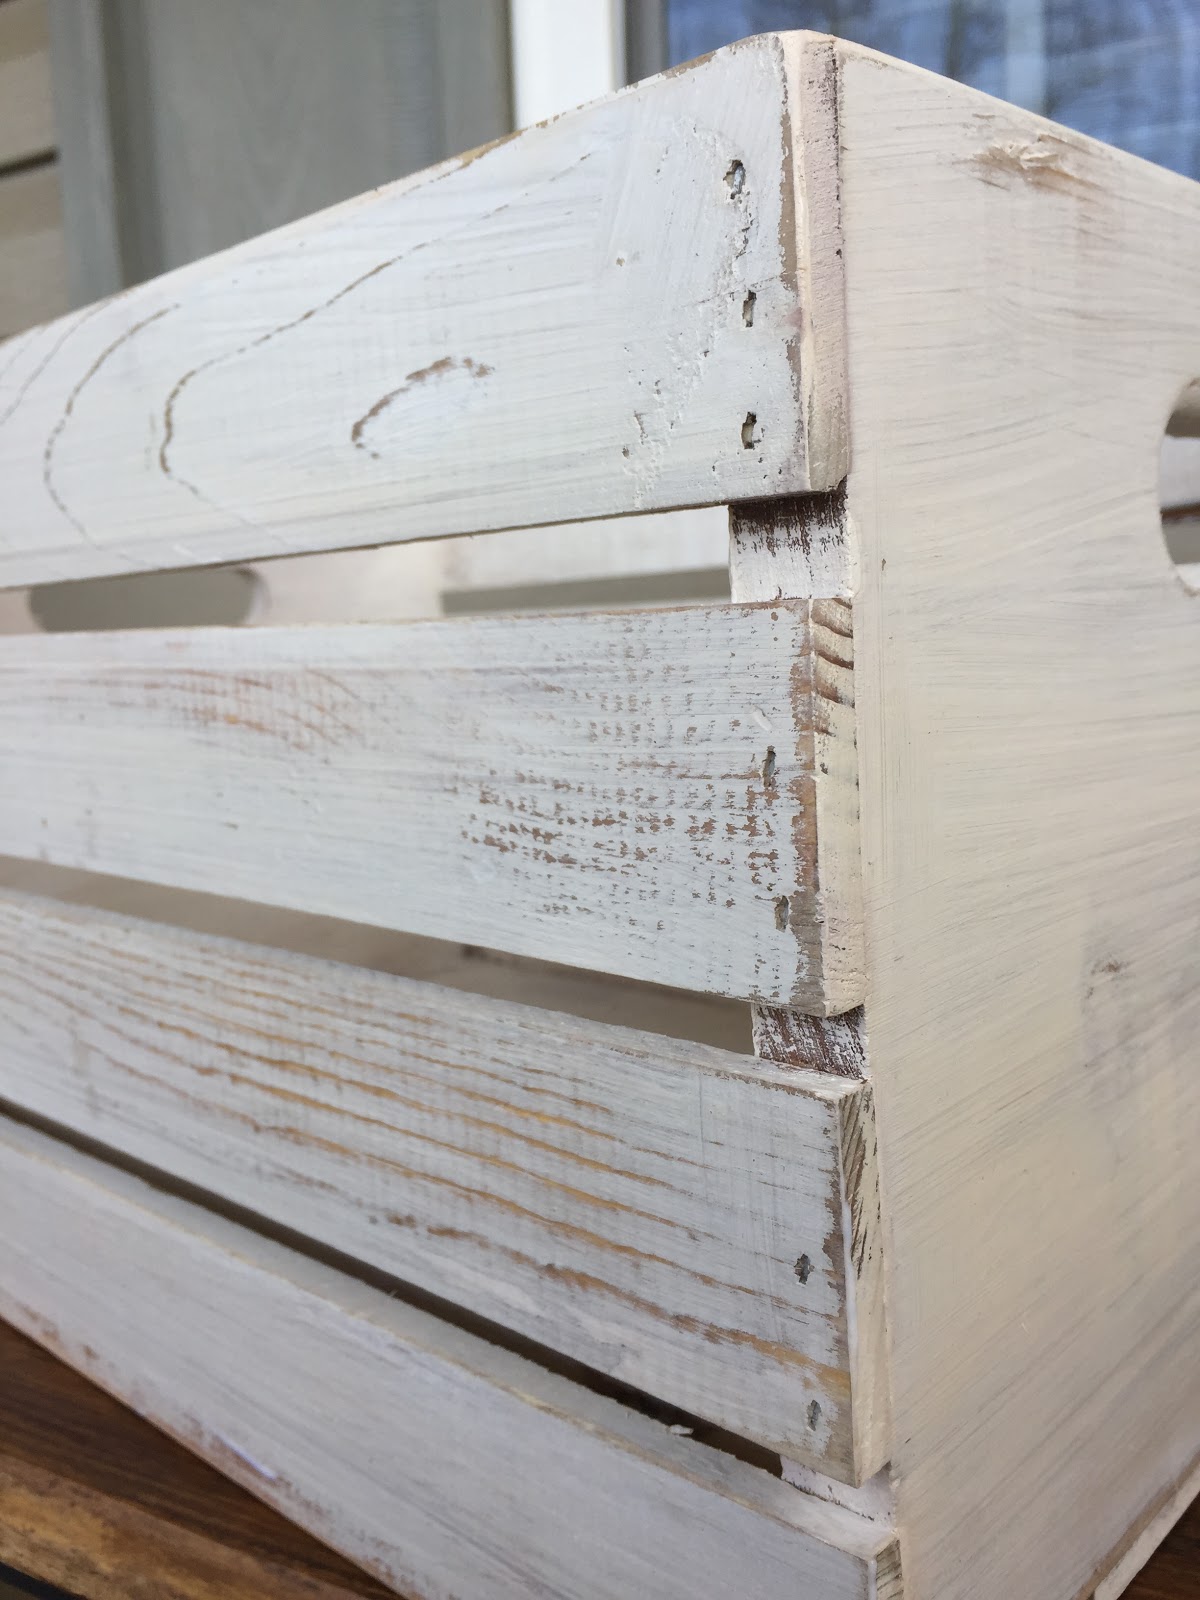
Let that dry completely and give it a good sanding with a hand sander and some 220 grit sandpaper.  Focus especially on the edges where natural wear and tear would happen!!  Don't worry about perfection.  You want it to look well loved and used!


Here is a close up of some of the detail.


So "farmhouse" don't you think?!!!  And that's what we love here!!  If you wish, you can add a coat of sealing wax to finish the project and you're done!!
Hope you try this at home and enjoy!!

Dear Lillie Chalk Print

Monday, January 30, 2017


Hello!  Today I want to share with you this great chalkboard print that I purchased a while back from Dear Lillie!  I love her sight and products!  She hand draws all of the original artwork and then makes digital downloads available for a very reasonable price!  You just choose your favorite, order, and then send your print to your favorite office supply store for printing.  I chose Staples and got this large print for I think $2 or $3 dollars!  Jennifer Holmes over at Dear Lillie Blog also has this great tutorial for printing and making your own frame for your new print!  Well worth the read!  

DIY Topiaries

Monday, January 30, 2017


These little topiaries are quick and easy pieces to tuck into you decor!  I found these cute chippy paint farmhouse boxed at Hobby Lobby for 50% off, making them about $5.00 each!! I just couldn't pass them up!  You can buy little pieces of floral foam and hot glue them to the bottom and them just find an appropriately sized stick in the yard (yep, free)!  Then push one end of the stick into a boxwood orb and poke it down into the floral foam.  To fill in the extra space you can use burlap and just tuck it in around your stick to just below the top of the box, and then cover the top completely with dried moss! 


 There you have it, and it is much better than buying the topiaries already made!!


DIY Farmtable

Friday, January 27, 2017


  We love our table! It is so sturdy and seats eight comfortably!  The cost was about $100 not including the chairs.  We made the matching bench on the other side, as well.  That was about another $25.

  Then we just paired it with the white x-back chairs from IKEA and the end chairs with slipcovers are from IKEA as well!   I love those, by the way!  They are so well made, and the fabric is of excellent quality!  But best of all?  They are machine washable!!  A mother's best friend!


 The table was so easy, and my husband and I completed the construction part of it in about two hours on our date night!  So fun!!  It's nice to have a guy that is willing to help you with your crazy ideas!! Anyway, you can build it too from this site.  Ana White has the most amazing plans!  We will be doing the farmhouse bed later on, and we will show the whole process and final product on the blog.  I can't wait!!


Slipcovered Furniture

Friday, January 27, 2017


  Hello, and welcome again!  Would you believe we had dark green microfiber furniture?!  Yes, we did.  When we built our home, we were into the country burgundy and green.  Let's just say that is past.  Yes, definitely, past.  I have slowly been converting everything to farmhouse style with neutrals.  That is probably the one major thing I have learned over the years.  Fads and colors look so nice on Pinterest and other's homes, but then you are stuck. Unless you do a complete makeover and remodel.  Big. Mistake. However, if your base (i.e. walls, main pieces of furniture, etc.) are neutral, and you change your mind, all you have to do is switch up small decor items like toss pillow covers and accent pieces!  Lesson learned!
   I was on a budget and couldn't replace the furniture to meet the demands of my new ideas, so slipcovers were the next best thing.  Then, wow, they cost more than furniture if you want them to fit properly!  So, enter Marian over at Miss Mustard Seed!  What a lifesaver!  She used painters dropcloth for cost effective fabric, and even made a step by step video tutorial showing how to custom fit and sew your own slipcovers!! You can check it out for yourself here!  She is so encouraging I just know you will love her as much as I do!!


"Antique" Tool Caddy

Friday, January 27, 2017


  I LOVE THESE THINGS, and they are so easy to make!  If you have a saw (which I do) you can make the cuts yourself.  Otherwise, they will do that for you at Lowes or Home Depot!  My base is 12 x 24 inches, and the sides are made from 1x4's.  There are two pieces at 24 inches and two pieces at 10 1/2 inches.  Just screw the side pieces together to form a box and then lay your bottom piece on top and screw it to the side pieces from the bottom.  Flip it upright.  Now that you have your box, make the end pieces to hold the handles.
  These can just be from the 1x4's as well.  Cut them at about 10 inches long and taper the ends with an angle on the saw if you wish.  Then stack them up evenly and drill a whole near the top with a 1 in drill bit (for your metal bar to slide through for a handle).  Now attach them to the inside middle of the ends using screws.  You will need a metal rod at about 22 1/2 inches long. Measure from the outside of the rod for appropriate sizing (remember that your whole is 1 in.) Now push the rod through the ends.  If it is a bit too snug, you can file the inside of the whole with a curved file until the rod will slide in, but keep it snug.
  To finish the tool caddy I just used a vinegar and steel wool stain (more coming on that in a separate post), let that dry and then paint with white chalk paint and let dry.  Sand with a rotary hand sander until it looks as "antique" as you like and then seal with finishing wax if desired!  More on making arrangements for the box later!  If you have any questions, please feel free to ask!

Botanical Wall

Friday, January 27, 2017


  Today I want to show you these cute botanicals!  I had a blank wall in the bathroom that definitely needed some character.  I have had my eye on botanicals for some time, but to buy them, you guessed it - expensive!!  So I just went to Pinterest for help and found these free botanical prints here!  We just printed them on photo paper (card stock would also work) and slipped them into inexpensive frames!  These were printed in size 8x10 which would look pretty small hanging on a wall, but a simple trick is to buy 11x14 frames that are matted to 8x10 to give a the illusion of larger artwork, then simply add multiples!!

Welcome

Thursday, January 26, 2017


I can't tell you how glad I am that you stopped by!  I am so excited to get started sharing tons of DIY projects, decor ideas, furniture finishing techniques, recipes, and home life and tips and tricks of the trade!! 
The name for this blog came when we were talking about starting the blog and my husband said, "What is important to you?".     
   I said, "Other than God, my husband and children, etc...?". 
  What he meant was something in my surroundings.  I looked around and said that I know it sounds crazy, but my farmhouse pitcher on the table.  Simple as it may be, it screams "FARMHOUSE", and yet it is elegant, versatile, and functional!  What's not to love? It embodies my theme beautiful, farmhouse, practical, home.
  So there it was - The Pitcher & Table.  I kind of hope that maybe someday it will expand beyond the blog, but whatever the LORD has in store for our future,  I'm happy to be sharing it with you!  I hope you enjoy every page!

Heather

Coming Soon!

Wednesday, January 25, 2017

Thanks for checking out The Pitcher & Table blog. We are preparing our site for launch in February 2017. Check back for ideas on life, do it yourself projects, and decor. See you soon!

Popular Posts

Translate